Orthotic Therapy for Metatarsal Pain

ICB Lower limb biomechanics

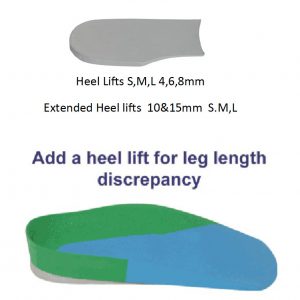
Orthotic therapy often is a therapy which involves some adjustment to the prescription of the treatment device. The therapy, rather than being a ‘one size fits all’ approach is one which requires working with the patient to get the desired result.

By that we mean that different conditions will require different treatment approaches and different orthotic prescriptions to meet patient expectations and to provide required results.

Orthotic devices are mechanical devices and often an alternative approach is required due to shoe styles and other issues which impede the treatment process.

One such issue is problematic movement of additions and in this instance the metatarsal dome placement on the orthotic device.

Issues that are most prevalent are:

1) Placement on the orthotic

2) Positioning of the dome in relationship to the patients foot.

3) Soft and firm domes which to use?

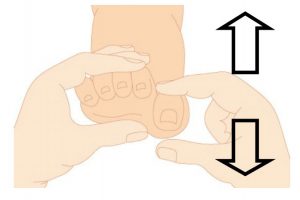
4) Movement of the dome.

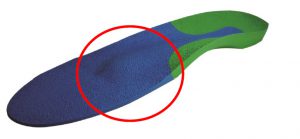
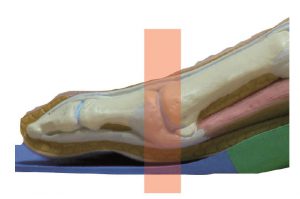
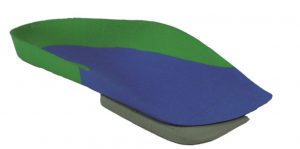
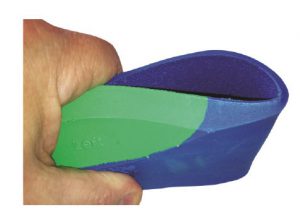
Usually ‘met’ domes are adhered to the dorsal surface of the orthotic.

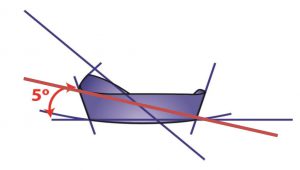
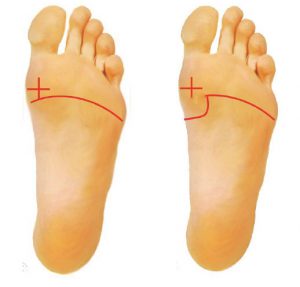
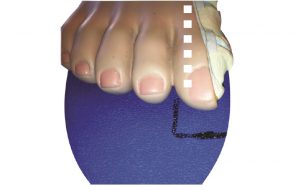
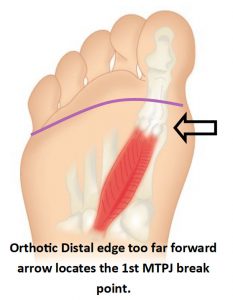
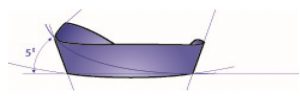
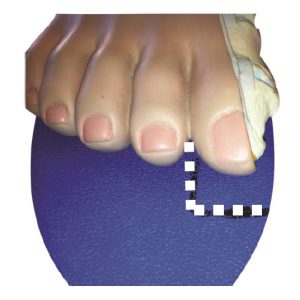
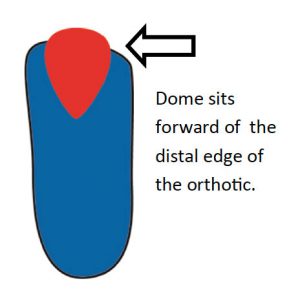
We advise that the distal edge of the dome should approximately 5mm forward to the distal edge of the orthotic device.

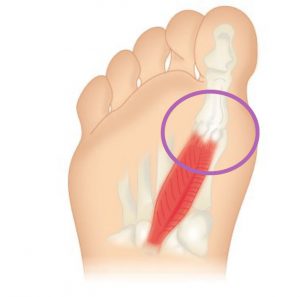
The positioning will lift the metatarsal shafts and not impinge on the metatarsal joints during toe off phase.

ICB Orthotic Dome Adjustment

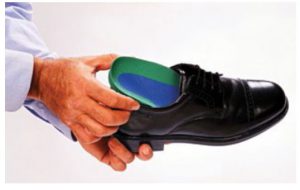
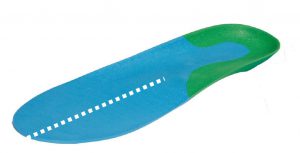
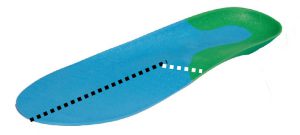
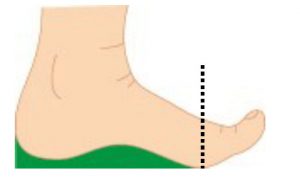
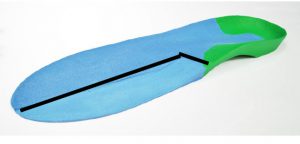
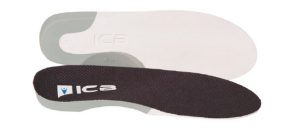
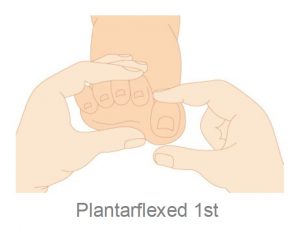
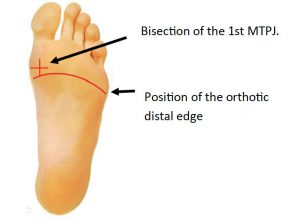
When using a Full length device practitioners will need to establish where the orthotic ‘distal’ edge sits on the orthotic device .

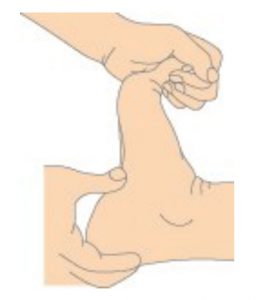
In this case just fold back the forefoot of the Full length to reveal the position of the bisection of the 1st MTPJ.

ICB Orthotic Dome Adjustment

Soft as opposed to Firm domes can be a matter of preference, however, if correctly positioned the patient will not find the firm domes uncomfortable to wear.

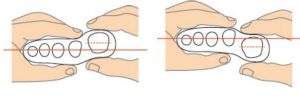
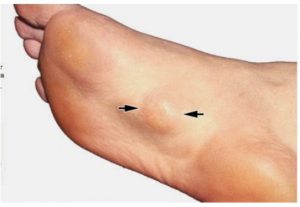
Positioning should be an outcome of the type of issues the patient present with, such as, pain or discomfort between 3rd & 4th or 2nd and 3rd met heads. Often a temporary placement is beneficial as the position can be adjusted until the patient feels that they are happy with the position. If the 3M tape is not sufficient to hold the dome in position then a more permanent fixing can be achieved with glue such as a spray glue.

Glue for Orthotics

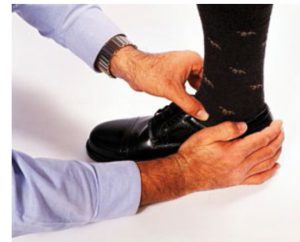
Often patients complain that the metatarsal dome addition has a tendency to peel off the dorsal surface due to getting caught on their socks as they place their foot into the shoe.

Orthotic dome

View ICB Products

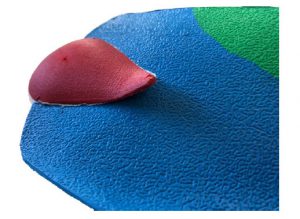
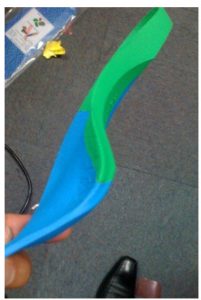
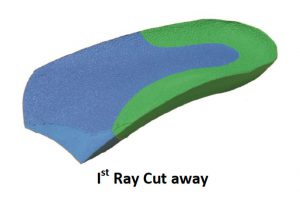
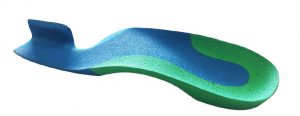
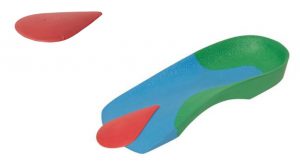
The remedy for this issue is to create an ‘intrinsic’ metatarsal dome, that is, create the metatarsal dome in the actual orthotic device– Intrinsic—built in or become part of the device. 

Completing the intrinsic dome modification will remove the likelihood of the addition peeling off or getting caught on the patients sock.

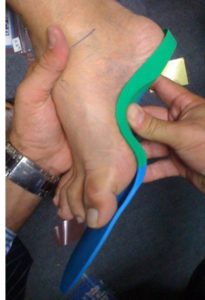
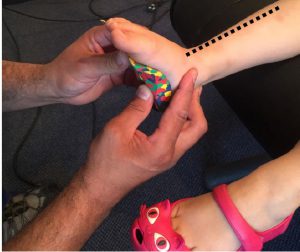
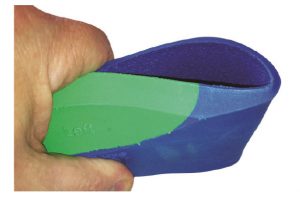
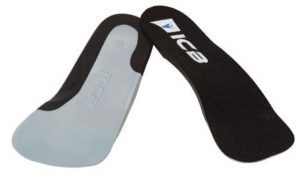
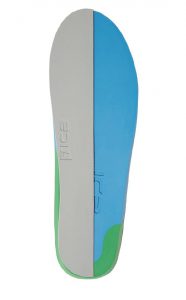
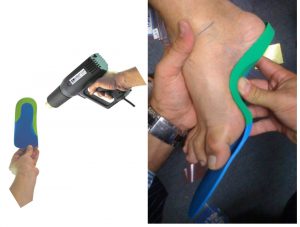
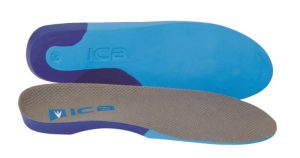
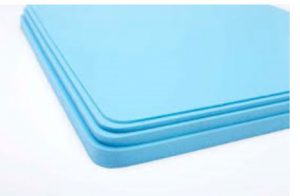
ICB orthotics are 100% EVA material which moulds well under heat and is highly adaptable.  To effect this adjustment practitioners will need to establish the position on the patients foot where the metatarsal dome is to be positioned.

Podiatry and Orthotics

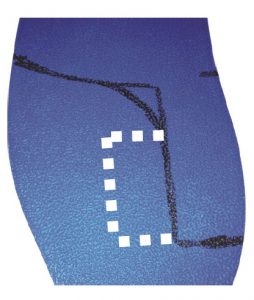
Place the correct size Dome—Small for small foot Large for Large foot on the Plantar surface of the orthotic and draw the shape of the dome.

Orthotic adjustment with Heat

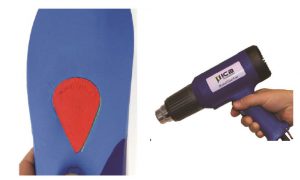
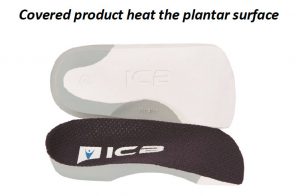
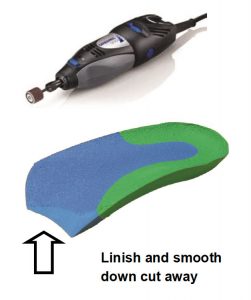
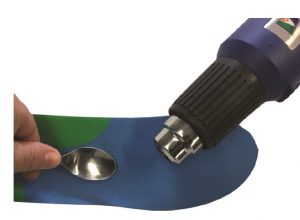
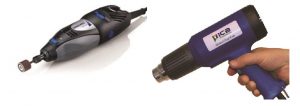
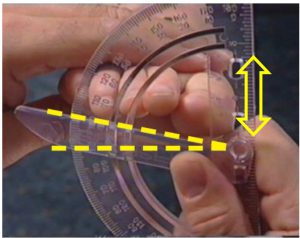
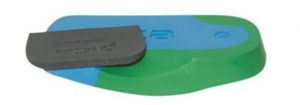
Remove the Dome and using a Heat gun apply heat to area that you wish to deflect.

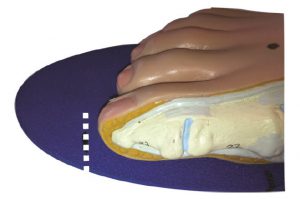
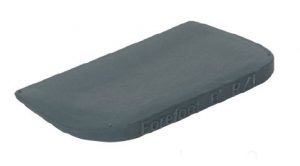
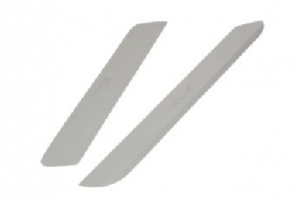
Next place the FIRM dome on a hard flat surface and position the orthotic on top in the correct position for moulding.

Orthotics ICB

Once you are able to see the shape of the dome you can apply 3M tape to the dorsal surface of the dome in readiness to apply to the plantar surface of the orthotic.

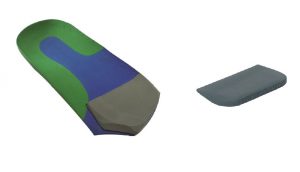
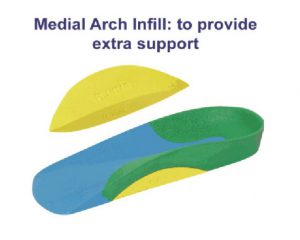
At this point a decision can be made as to whether you wish to use the firm dome OR another material such as felt or poron to infill and maintain the shape of the in-built dome.
Poron For Orthotic

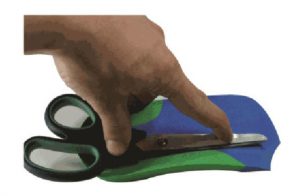
The shape can be cut and glued into the cavity and then ground flat on the base for the best fit.

Orthotic Dome

View ICB Products

To heat or not to heat an orthotic?

ICB Lower limb biomechanics

Often practitioners ask if there is really any reason that they should bother heating and moulding the ICB orthotic product.

Whilst the product can be used directly out of the presentation pack and placed into the shoe, heat moulding provides an added dimension in maximising patient compliance.


View ICB Products

Generally we recommend that upon observation if the rearfoot position is lower than +3° or greater than +6° heat moulding will definitely benefit the patient. The ICB product exhibits a 5° rearfoot varus Intrinsic angle to assist in realignment of the calcaneus.
Orthotics Heat Moulding

When treating rearfoot greater than 5° – 6° will be beneficial and for more pes planus foot types reducing the average 42° arch height will provide more comfort for the patient.

Measuring Orthotics

When a deflection is required to deflect around a callus etc. practitioners can use a spoon to make a deflection directly in the product.

Heating Orthotics

Often practitioners have to deal with highly unusual foot issues and the use of an adaptable heat mouldable product can be extremely helpful. Product should be chosen with the mindset that they have the capability to be modified and when the situation arises they then have the tools to perform that particular function for the patient.

Orthotics

The moulding above may seem extreme , however this product was actually customised for a patient in Asia.

The patient suffered an injury and the foot was set in a particular position which created a functional right long leg.

Fitting an orthotic

The patient refused further surgery and requested conservative treatment. This extreme moulding was combined with shoe wear that had a large heel height such as a boot to provide the desired result for the patient.

Practitioners are encouraged to experiment and use alternate methods of moulding to the patients foot shape. One such method is pictured, the foot and orthotic is wrapped in a bandage in the ideal or STJN position due to the patients inability to weight bear.

foot and orthotic is wrapped in a bandage

Difficulty can be experience when treating children and so alternate moulding methods should be experimented with in an endeavour to be able to treat the entire patient base.

Issues with treating children and heat moulding can be overcome by using a non weight bearing moulding method as seen below.

Childrens Orthotics

This non weight bearing method can be very effective. The use of the Anterior Alignment Method for ideal or STJN is recommended to establish positioning.

The ICB normal method of moulding is in weight bearing position, however, alternate methods can be used to treat patients whilst maintaining the patients ideal position.

Generally product that does NOT have a material cover can be heated on the dorsal and plantar surface, whereas with covered product such as, seen below , should only be heated on the plantar surface to avoid burning the material cover.

ICB Orthotics

A recent development in the ICB product is the reduction in the heat time that is required to attain the optimum level of elasticity in the EVA material.

Close observation to the heating process is necessary to produce a well moulded product. Re-moulding is possible with the ICB Heat mouldable product, albeit with some loss of density integrity in which 5-7% softening of the molecular structure will be experienced on the re-heating of the product.

To start maintain the heat gun at a distance of approx. 10-15cm. The heating process commences by using 3 circular motions on the plantar surface located in the medial arch area concentrating on the words RIGHT & LEFT and then a further circular motion on the plantar heel area.

Heat Moulding Orthotics

Continue until the words RIGHT and LEFT tart to Melt indicating that the thermal heat level has been attained.

Orthotics in shoes

Request that the patient inserts the UN HEATED product in their shoe as this will provide foundational stability and avoid causing a functional leg length.

Next remove any factory fitted shoe innersole and place the heated product in the shoe.

Orthotics in shoes

Place the foot to be moulded in the ideal or neutral position using the Anterior Alignment method and Talo Navicular method.

Maintain for 30-40 seconds. Then remove the product and allow to cool down approx. 1-2 minutes and commence the procedure again for the alternate foot.

View ICB Products


Creating a Plantarflexed 1st Deflection

ICB Lower limb biomechanics

Often the orthotic device requires some adjustment to suit the patient and assist in alleviating the pain that they may be suffering.


View ICB Products

One such deflection is a plantarflexed 1st or 1st Ray (metatarsal) cut away deflection.
ICB Orthotic

A plantarflexed 1st metatarsal phalangeal joint (MTPJ) sits plantarflexed to the lesser metatarsals and can be a fixed osseous or mobile condition which can result in the patient suffering from Sesamoiditis (inflammation or bifurcation of the sesamoid apparatus). A supinated foot position and forefoot Valgus can often accompany this condition.


Sesamoiditis

Sesamoiditis – impingement of the Sesamoid apparatusTo assess for a plantarflexed 1st place the foot in the neutral and take hold of the lesser metatarsals (2nd to 5th). Using the thumb and pointer finger to grip the 1st MTPJ and lesser metatarsals – the amount of dorsiflexion and plantarflexion should be 5mm up and 5mm down from the axis of the lesser metatarsals.

Plantarflexed Assesment

Plantarflexed 1st assessment

The image (above) indicates a mobile plantarflexed 1st, having limited dorsiflexion with significant plantarflexion.

If the joint will not move then it is a fixed Plantarflexed 1st, meaning that there is no dorsiflexion or it is minimal, and that it sits in a fixed plantarflexed position.

Treatment for a Fixed Plantarflexed 1st will be a ‘1st ray cut away’ deflection created in the orthotic which will provide 1st metatarsal relief and support to the lesser metatarsals.

Plantarflexted 1st deflection

Creating a 2/3 or ¾ length cut away

1st metatarsal Phalengeal joint

Step 1
Place the device on the base of the foot and draw an arc around the 1st metatarsal Phalengeal joint sits.

Step 2
Ensure that the 1st MTPJ is free to plantarflex and grind or linish the orthotic so that the contour is comfortable for the patient by using a hand grinder or bench grinder.

ICB Orthotic Grinder

Some time the amount of support provided by the orthotic under the lesser metatarsals is insufficient and the patient will continue to feel pain under the 1st MTPJ. In this case more support may need to be affixed to the transverse arch of the orthotic to support the lesser metatarsals.

To increase support in the transverse arch, measure the difference between the axis of the lesser metatarsals and the 1st MTPJ, then add a forefoot addition wedge to the orthotic to support the lesser metatarsals. The forefoot addition should be positioned with the thickest side to-wards the distal edge of the orthotic.

ICB Orthotic Addition

To assess the amount of additional support required when the 1st MTPJ is mobile, if for example the measurement is 8mm in plantarflexion and 2mm dorsiflexion to the lesser metatarsals, subtract the 2mm from the 8mm, thus providing the required amount of support – in this case 6mm or 6°.

plantarflexion

This type of orthotic adjustment is called a ‘2-5 Metatarsal Bar’, which can effectively decrease pressure on the metatarsal heads by supporting the metatarsal shafts.

When modifying a Full Length orthotic product to create a 1st ray trench follow the steps below:

Step 1
Mark out the width of the trench by placing the foot of the orthotic and scribing a line between the Hallux and the 2nd Phalange.

Using Orthotics

posterior position of the 1st MTPJ

Step 2
Mark the line on an angle to allow the posterior position of the 1st MTPJ to be unimpeded by the orthotic arch.


Working with ICB Orthotics

Step 3
Place the device on a firm surface when grinding with a Dremel Hand grinder and remove the eva material leaving 1mm on the plantar surface and remove excess material behind the 1st MTP Joint.


View ICB Products

SAVE 10% OFF ICB PRODUCTS WITH DISCOUNT CODE: 02ICB10 Offer online only!

Choosing the correct size orthotic

ICB Superior Biomechanics

Choosing the correct size orthotics for the patient can be somewhat of a minefield if practitioners do not follow the correct procedure.

SAVE 10% OFF ICB PRODUCTS WITH DISCOUNT CODE: 02ICB10 Offer online only!

View ICB Products

Orthotics in which the Distal edge of the orthotic (2/3 or 3/4 style) is too long can cause issues for the patient such as, Sesamoiditis.

Orthotics for Foot

Sesamoiditis condition can occur when the 2/3 orthotic distal edge protrudes past the ‘break point’ of the foot and impinges the sesamoid apparatus.

Orthotics that are too short can encourage the patient to excessively pronate due to the devices inability to maintain the longitudinal arch position. A further issue is excessive internal tibial rotation.

Therefore the simple act of prescribing the correct pre-made orthotic size can be either extremely beneficial or somewhat of an issue for the patient.

Usually the orthotic size is determined by the shoe size, however, often patients present with shoes that are 1 or 2 sizes larger than they really need based on reasons best known to the patient. In this instance the arch contour can be longer than the patient requires and the orthotic arch can impinge upon the patients 1st MTPJ causing irritation of the sesamoid apparatus.

If the product being used is able to be heat moulded well into the patients arch and attention given to the area beneath the 1st MTPJ to ensure that the arch does not impinge, then, a larger size to fit the shoe can be acceptable although this situation is not ideal. There are three ways to determine the correct size is:

1) use the patients shoe size

2) use the shoe sizing guide and

3) physical measurement of the device on the patient.

The issue with shoe sizing is that it appears that there is no standard shoe size guide worldwide and a size 8w may be a 7.5w or a 8.5 -9 w in another shoe brand and therefore physical measurement become the only reliable way to determine the correct size orthotic.

*Brooks * asics *New Balance

*Addidas *Nike *Misuna

*Saucony *Spenco All different sizing

The Distal edge

Placing the product on the base of the foot and observing the position of the orthotic distal edge will deter-mine the correct size. The Distal edge should be 5-10 mm proximal to the 1st MTPJ or ‘break point’ of the foot.

Full Length sizing fold back orthotic to identify the distal arch. position.

Note the position of the 1st MTPJ on the full Length product in the photo.

The joint should sit approx. 5-1 mm proximal to the joint to allow the foot to break at toe off stage of the gait cycle. Impingement of the joint is not recommended.

Foot Orthotic

Some orthotic manufacturers provide sizing template guides (such as ICB below) however this is not a common practice.

ICB Foot Size Chart

(Above : ICB sizing template)

Measurement on the foot is therefore considered as the most reliable way to measure the device for the patient.

Physical measuring is important when patients present with short arch or long arch , long and short toes.

Short arch may need to either choose a smaller size orthotic or heat mould the orthotic really well into the arch and concentrate the heat around and under the 1st MTPJ to contour the product and remove any pressure from the orthotic arch on the 1st MTPJ.

Long arch may require a larger size orthotic and then the length will need to be trimmed to fit the shoe.

Wide feet can be problematic as the general orthotic designs in the marketplace do not cater for wide feet and practitioners may have to choose a product such as the ICB DRESS 2/3 Style design which has a lateral skive to allow for the foot to splay laterally.


Shorter wide feet can be adequately catered for with this product as the distal edge can be trimmed to reduce the length of the orthotic design

ICB Orthotics

(above ICB Dress style with lateral edge removed to allow for patients with wide feet.

View ICB Products

Modifying orthotics

ICB Lower limb biomechanics

One issue that often surfaces when using orthotic products is, whether there is a need to heat mould and apply additions or grind and modify the orthotics?

SAVE 10% OFF ICB PRODUCTS WITH DISCOUNT CODE: 02ICB10 Offer online only!

The question of heat moulding often arises and the answer is simply, it may not be necessary in every situation. However, heat moulding does assist in avoiding patient compliance issues.

Using additions to improve the treatment of the basic orthotic foot bed, is one, in which many practitioners are not that familiar with in the modification process.

Most additions are used to treat specific conditions by providing the support which has been lost, such as: metatarsal domes to support the transverse arch or a heel lift to support a short leg.

Many orthotic manufacturers promote their products as being one which can be taken from the display pack and placed in the shoe with no further alteration needed. This may be so for some patients, however, simple adjustments may provide the necessary comfort and treatment result the patient requires.

A key element to achieving a satisfactory treatment commences with checking that the ‘off the shelf’ orthotic contains at least a basic rearfoot varus angle to enable correct alignment for the patient.

Products available in pharmacies often only provide arch support without attending to rearfoot (calcaneal) control.

Practitioners should check the rearfoot position by simply viewing and where necessary measuring, using a biomechanical protractor.
Measuring, using a biomechanical protractor.

ICB heat mouldable orthotics exhibit a 50 rearfoot varus post to align the calcaneus with the average tibial varum angle, thus placing the foot into the patients ideal position.

ICB heat mouldable orthotics

View ICB Products

Reducing excess pronation can have substantial benefits, such as reducing internal tibial rotation.

ICB Orthotics Reducing Pronation

The product that a practitioner chooses to use, should be one which is easy to modify and alter, thus providing the necessary treatment requirements. For example, ability to incorporate an intrinsic dome into the orthotic device, thus providing the patient with a product with increased functionality or provide more comfort to the wearer.

Orthotic Heat Moulded

Use a heat gun to mould the dome into the plantar surface. (see other videos on Youtube)

Simple add on additions, such as, medial flanges can reduce medial rubbing of the foot on the shoe or provide increased support for patients such as CP suffers and excessive pronators can be quite useful.

ICB orthotic medial flange

For practitioners who want to modify the actual orthotic by grinding , there are many simple adjustments that can be made, such as a deflection for a plantarflexed 1st . (see below)

Orthotic modified by grinding

Pictured below is a 1st metatarsal deflection for a 2/3 or 3/4 length orthotic.
1st metatarsal deflection for a three quarter length orthotic

The ability to adjust and modify the product within the clinic can be a great asset. The product should have the ability to be modified by either application of heat (using a heat gun) and also be a material that can be ground and shaped using either bench grinders or hand grinders.

Modifying an Orthotic

(above) Deflection for dropped metatarsal heads using heat and a spoon to create a depression .

For those practitioners with higher hand skills the grinding option is fast and extremely effective.

One very useful modification is the use of a full length ICB orthotic product to fashion a Morton’s ramp in which toe separator is an incorporated feature.

The steps to creating this modification are as follows:

Step 1
Mark the distal position of the ramp, 5mm distal to the hallux.

Modifying Orthotics

Step 2

Mark out the Morton’s ramp ensuring that it sits between the hallux and the 2nd phalange.

Mortons Ramp

Step 3

Add the toe separator shape and cut to shape.

Toe Separator

Step 4

Use the heat gun and the grinder to position the toe separator and smooth down the edges.
ICB Heat Gun

ICB Heat Moulded Orthotic

View ICB Products

Orthotics and Difficult Shoe Styles

ICB Superior Biomechanics

When practitioners use orthotic therapy , there are a number of considerations that should be considered.

1) Assessing the patient and ‘getting it right’ !

2) Deciding if multiple orthotic devices will be needed to treat the patients condition.

3) Choosing the right orthotic style to fit in the patients shoe wear.

The assessment is crucial. Overlooking or failing to assess adequately, will certainly affect the efficacy of the prescribed device.

Issues such as unilateral excessive pronation or lateral ankle knee and hip pain can often indicate underlying biomechanical issues that should be pursued and addressed.

Often more than one type of device may be required to meet the needs of the patient and assist the practitioners suggested treatment. Treatment could involve a pair of orthotics for the cross trainer shoe and a further pair for high heeled shoe wear.

One consideration that has been driven by fashion is how to treat patients who wear shoes such as ballet flats!

Ballet Flat Shoes

Of course this style is not ideal and the patient needs to be made aware of that fact, however, patients continue to use the style and expect that they can receive a treatment result from orthotics.

The orthotic device will never be able to treat effectively when wearing this style . All a practitioner can do is to remind the patient of this and then prescribe an orthotic style that can , in some measure, provide the wearer with a degree of treatment and relief from the assessed condition.

ICB has a product that is very thin and able to be used in the ballet style as it does not feature a heel cup and therefore reduced heel slippage.

ICB High Heel Orthotic

This design was developed for High heel shoe wear and there-fore has a reduced rearfoot varus angle to allow fr the supination effect when worn in shoes with heels higher than 25mm.

ICB Rearfoot Addition

When prescribing for ballet flats it is advised that additional rearfoot varus control will be required to assist in reducing calcaneal pronation (eversion) .

Rearfoot ballet flats

ICB recommends that a 2 or 4 degree Rearfoot Varus addition be used to invert the rearfoot and compensate for the reduced intrinsic rearfoot in the High Heel orthotic model.


View ICB Products

Forefoot Valgus or Plantar Flexed 1st?

ICB Lower limb biomechanics

The topic of Forefoot valgus is an interesting one due to the confusion that often arises as to whether it is an actual Forefoot Valgus or as is often the case a misdiagnosed Plantarflexed 1st and vice versa.

A forefoot Valgus deformity can be defined as ‘When the plantar plane of the forefoot remains everted relative to the plantar plane of the rearfoot when the sub talar joint is in the neutral (STJN) or patients ideal position.

Biomechanical protractor

Conjecture often arises as to whether the condition is solely genetic or acquired.

Forefoot Valgus has been described as a position in which a constant structural eversion of the forefoot exists and presents as the most common structural or positional deformity in the forefoot.

It is an everted position of the forefoot relative to the rearfoot at the level of the midtarsal joint. Inversion of the lateral column of the foot must occur to allow the forefoot to move to a pronated position during the midstance and then resupinate during the propulsive phases of gait.

forefoot valgus condition

There are generally two forms of forefoot valgus referred to in most texts:

1. Flexible forefoot valgus – This exists where there is sufficient flexibility in the midtarsal joint to allow the lateral column of the foot to reach the supportive surface during the stance phase of gait. The heel may function perpendicularly, but the amount of compensation that occurs leads to an unstable gait with late pronation through midstance into propulsion.

2. Rigid forefoot valgus – Where the range of motion in the midtarsal joint is not enough to allow the lateral column of the foot to touch the ground, rearfoot supination compensation is required to allow lateral strike and gait progression. This is a rarely seen condition clinically.

Generally the following issues are observed in Forefoot Valgus conditions or anomalies.

In the case of acquired it may be the result of surgery or as a compensation due to other issues which present and mechanically can present as rigid or functional.

Forefoot Valgus feet usually experience Excessive supination at the STJ accompanied by external rotation of the leg with resultant lateral instability of the knee, ankle and Sub Talar Joint. Forefoot Valgus feet will often present as a pes cavus structure exhibiting a loss of shock absorption mechanisms in lower limb with induced lower-back, hip, knee and shin pathologies.

The 1st MTPJ unlocks when supinated, with resultant forefoot hypermobility. A common com pensation is that a Plantarflexed  1st will present with the forefoot valgus to allow the 1st MTPJ to plantarflex to gain ground contact and thereby enabling gait positioning and toe off to take place.

Another common condition that may accompany the Forefoot valgus is a Tailor’s bunion and other conditions such as Plantar digital neuritis. Lateral Plantar fasciitis pain and Medial Sesamoiditis can occur together with Compensatory calcaneal (Sub Talar Joint ) pronation leading to Haglund’s deformity.

However when assessing often the forefoot valgus is misdiagnosed as a Plantarflexed 1st Metatarsal whereas both conditions can occur at times, in combination.

View ICB Products

plantar flexed metatarsal

A plantar flexed 1st occurs when the 1st Metatarsal joint sits plantarflexed to the lesser metatarsals, when the subtalar joint is in neutral. It can be either mobile of fixed (osseous).

Forefoot Valgus assessment

When assessing Forefoot Valgus commence by establishing the neutral or patients ideal position in supine Use the Anterior alignment to identify the neutral position.

Use the Left hand on the patients Left foot to ‘feel’ for Talo navicular congruity, whilst observing the Anterior Alignment position using ICB AAM technique.

Dorsiflex the 4th and 5th metatarsal Phalengeal joint to resistance whilst maintaining 10°of plantarflexion of the foot.

This is the most crucial part as, in assessment, one should not dorsiflex the foot past the point of resistance as this can ‘manufacture’ or create a forefoot valgus where none.exists

Observe the Anterior alignment ensuring that the 2nd metatarsal head is aligned with the Bisection point of the Talonavicular reference points and the Tibial crest on the lower 1/3 of the leg.

Compare rearfoot plane and forefoot plane and measure the amount of posting that needs to be applied to the orthotic using an ICB Biomechanical protractor. (see below) As a general rule, post only 1/2 the measured amount, or use the posting formula ouline in The Orthotic Solution book page 161 and 201.

To check for Plantarflexed 1st once you have dorsiflexed to resistance, take hold of the lesser metatarsals and maintain that position whilst

assessment for plantarflexed 1st

completing the assessment for plantarflexed 1st i.e. palpate the 1st MTPJ 5mm dorsiflexed to 5mm Plantarflexed whilst holding the lesser metatarsals in the Valgus position

See also: The Orthotic Solution book  Pages 34, 77, 160, 201

SAVE 10% OFF ICB PRODUCTS WITH DISCOUNT CODE: 02ICB10 Offer online only!

View ICB Products

Arch Pain When Wearing Orthotics

ICB Lower limb biomechanics

A common complaint amongst patient’s who have been prescribed foot orthotics is ‘pain in the arch’.
This type of pain can be the result of 4 common issues:

1) Pain can be due calcification (similar to dupuytren’s contracture) or a fibroma in the body of the Plantar Fascia, or a Ganglion cyst may be present. Dupuytren’s contracture in the fascia of the foot is called Ledderhose disease, or plantar fascial fibromatosis, and is sometimes associated with plantar fasciitis.

Arch pain when wearing orthotics

A ganglion cyst is a tumor or swelling on top of a joint or the covering of a tendon (tissue that connects muscle to bone). Ganglion cysts are among the most common benign soft-tissue masses. Although they most often occur on the wrist, they also frequently develop on the foot usually on the top, but can also occur on the plantar surface. Ganglion cysts vary in size, may get smaller and larger and may even disappear completely, only to return at another time. The exact cause of ganglion cysts is un-known, they may arise from trauma whether a single event or repetitive microtrauma.

Foot Cyst

TREATMENT: If there is calcification in the fascia, use manual therapy to break it down. For a fibroma or Ganglion cyst, a deflection will need to be heated into the orthotic using a deflective device such as a spoon, to accommodate and relieve any pressure from this area.


Watch this video on youtube on how to use heat to make deflection on an ICB Orthotic. 

Using heat on ICB Orthotic.

View ICB Products

2) Plantar fasciitis pain can be experienced at the attachment to the calcaneus. It is also refered to as Plantar Fasciosis a degenerative syndrome of the plantar fascia resulting from repeated trauma at its origin on the calcaneus1.

TREATMENT: Control rearfoot pronation using orthotics with intrinsic rearfoot posting to realign the feet to the Subtalar Joint Neutral Position (STJN).

If additional inversion is required to control and achieve STJN, add extra rearfoot wedges (2° or 4°) to provide additional Calcaneal control2. 

ICB Rearfoot Varus Addition

Orthotic with Rearfoot Varus Addition

A medial arch infill can also be applied to the orthotic to provide increased arch support.

Medial Arch Infill on ICB Orthotic

3) The Plantar fascia may be tight, and during gait (at mid stance to toe-off), compressing into the medial longitudinal arch of the orthotic causing discomfort and pain. To test for a tight fascia use the ‘Windlass Test’ (pictured below).

Plantar fascia - Windlass Test

TREATMENT: Create a plantar fascial ‘relief’ or ‘groove’ in the arch of the orthotic using heat or by grinding the orthotic. Place the groove 1 cm from the medial edge through the arch contour. Watch video here.

View ICB Products

Create a plantar fascial 'relief' on ICB Orthotic

4) The patient may exhibit unilateral excessive pronation as a possible compensation or due to plantar injury.

excessive pronation

TREATMENT: Unilateral arch pain can be associated with a leg length differencedue to long leg compensatory excessive pronation. If a structural leg length discrepancy is identified, a heel lift will need to applied to the orthotic on the shorter leg.

ICB Orthotic Heel Lift

View ICB Products

SAVE 10% OFF ICB PRODUCTS WITH DISCOUNT CODE: 02ICB10 Offer online only!

References:

1. CORNWALL MW. MCPOIL TG. Plantar Fasciitis: Etiolo-gy and Treatment. J Orthop Sports Phys Therapy 1999;29:756-76.

2. FROWEN, P., O’DONNELL, M., LORIMER, D., BUR-ROW, G. (2010) Neales Disorders of the Foot 8th Edition, p127

3. MICHAUD, T.C. (1997) Foot Orthoses and Other Forms of Conservative Foot Care, Sydney: William & Wilkins, p.114

Forefoot Varus or Forefoot Supinatus?

ICB Lower limb biomechanics

The issue of ‘Forefoot Varus’ is an interesting one as there are several misunderstandings in relation to this osseous condition. The first issue is the confusion in relation to Forefoot Varus and Forefoot Supinatus – the former being osseous in nature and the latter a soft tissue condition. The second issue is the proliferation of confusing terminology such as Forefoot Varus, Supinatus, flexible forefoot varus and forefoot invertus, to name a few.


View ICB Products

Therefore it can be said that a ‘forefoot varus is a cause of ‘overpronation’ and a forefoot supinatus is the result of ‘overpronation’.1

Merriman’s1 Assessment of the lower limb indicates that:

The Varus foot appears supinated with the lateral border of the foot rela-tively plantarflexed in comparison with the Medial border.

An inverted foot may be due to :

True forefoot varus. Boney abnor-mality, theoretically due to inadequate torsion of the head and neck of the talus during fetal development, but this is not well supported (Kidd 1997)

The presence of a true forefoot varus is said to lead to a very flat foot with no longitudinal arch (Grumbine 1987)

Forefoot supinatus is Acquired soft tissue deformation due to abnormal pronation of the rearfoot. The forefoot Is held in an inverted position be-cause of soft tissue contraction.

It can be difficult to differentiate be-tween a Forefoot Varus and a Fore-foot Supinatus.

The most common test is where a plantar grade pressure is applied to the dorsum of the 1st ray or metatarsal. The 1st Metatarsal shaft should plantarflex and is this does not occur then it is deemed to be fixed osseous condition, whereas if it is mobile or there is some ability to move in a plantarflex direction it a Forefoot Supinatus.

In summary ….a forefoot varus differs from forefoot supinatus in that a fore-foot varus is a congenital osseous deformity that induces subtalar joint pronation, whereas forefoot supinatus is acquired and develops because of subtalar joint pronation.2

Other conditions3 that are due to inverted forefoot are:

A) Dorsiflexed 1st Ray( metatar-sus Primus)
B) Plantarflexed 5th ray both fixed and mobile are possible.3

Assessment :
The Varus foot often looks banana shaped and the navicular has dropped and is excessively everted.

Forefoot Varus or Forefoot Supinatus?

The supinatus foot mimics the Varus foot in most respects, however, the banana shape is not as prevalent and it is able to be distinguished by the ‘Supinatus – Varus test’.

The supinatus foot

Orthotic Prescription:
Forefoot Varus
When devising the orthotic prescription, firstly the mobility of the rearfoot should be assessed.
If the Rearfoot is mobile, medium to firm orthotics can be prescribed to support and control the foot, with a forefoot varus addition posted to the medial forefoot.

ICB Orthotics addition

Alternatively, if the rearfoot is mobile and requires additional inversion (i.e more than the intrinsic posting in the orthotic device) an inversion ramp can be attached to the entire medial aspect of the orthotic.

ICB Inversion Rmp

ICB Orthotic Addition

Orthotic with Inversion Ramp.

When the patient has a fixed or arthritic rearfoot, then soft to mid density accommodative orthotics are more effective, with a forefoot varus wedge attached to the medial forefoot. This type of foot can, because of the mobile forefoot, experience conditions such as, Metatarsalgia, morton’s neuroma & mid tarsal periostitis.

Periostitis is an inflammation of the covering of the bones, if left untreated it can progress to a stress fractures.

The Forefoot Varus Addition on the orthotic fills the space under the 1st MTPJ providing the mechanism for toe off to occur by creating normal ground reaction forces to occur at toe off in gait.

ICB Orthotic FFT Varus Addition

ICB Full length Orthotic

Soft orthotic for fixed rearfoot

In both cases (i.e. mobile & fixed rearfoot with forefoot varus) extra support can be provided by applying medial flanges (soft or firm) to the dorsal arch area which can also assist in reducing friction on the medial aspect of the foot. Orthotic Prescription: Forefoot Supinatus.

ICB orthotic medial flange

Patient’s exhibiting a forefoot supinatus do not require any additional medial forefoot wedging or modification to the orthotic device .

The reason for this is that once the foot is inside the shoe wear the shoe ‘sock’ upper will assist in a plantarflex action to the dorsum of the foot and this will assist in stretching the contracted soft tissue.

Adding or Posting medial addition or wedge to a SUPINATUS condition will ultimately create a disruption and exostosis between the articulation of the medial cuneiform and base of the first metatarsal at the medial cuneiform joint (1st tarsometatarso joint). .4.

View ICB Products

References :

1. Merriman’s Assessment of the lower limb Ed 3 p259-261

2. Forefoot supinatus.Clin Podiatr Med Surg. 2014 Jul;31(3):405-13. doi: 10.1016/j.cpm.2014.03.009. Evans EL1, Catanzariti AR2.

3. Merriman’s Assessment of the lower limb Ed 3 p261

4. Neal’s Disorders of the foot 8th Ed Frowen, O’Donnell,Lorimer,Burrowp126


Pes Cavus Feet and Orthotics

ICB Lower limb biomechanics

The term Pes cavus is derived from Latin meaning ‘hollow foot’ and covers a wide spectrum of foot deformities.

The Pes cavus foot can be hereditary or acquired and the underlying causes can be neurological, orthopaedic or neuromuscular. The condition can be wide ranging from conditions such as Chartcot-marie-tooth disease (CMT) and Fiedreich’s ataxia to the more commonly high arched supinated foot acquired from familial predisposition.
View ICB Products

Pes Cavus Feet - High Arch

The CMT foot symptoms are progressive and can include :

 • Ankle weakness
• High arches
• Clawed toes
• Muscle wasting
• Poor balance
• Muscle weakness in hands and feet
• Peripheral neuropathy

The Pes cavus foot

More commonly the condition is not so severe and is generally characterised by an abnormally high medial longitudinal arch, is described as a high axis foot and is most commonly associated with a high forefoot valgus deformity. Other features often include a varus (inverted) calcaneus, a plantarflexed position of the first metatarsal and adducted forefoot together with dorsal contracture of the toes or hammer toes.

Pes cavus feet will invariably be identified as supinated feet and characterised as having ‘reduced or limited pronation’.1 Population-based studies suggest that the prevalence of the cavus foot is approximately 10% 2 .The high arched cavus foot has a decreased range of motion, increased stiffness, and decreased pronatory compensation1.

Often this type of foot will exhibit increased rearfoot varus together with a higher incidence of lateral instability of the foot and ankle1.

Valmassy3 outlines 6 characteristics of a cavus foot:

1) Limited pronation

2) Rigidity

3) Uneven weight distribution

4) Digital contractures (clawing of the toes)

5) Increased tendency to lateral ankle instability with associated ankle sprains

6) Decreased ankle joint dorsiflexion(osseous block)

Inversion Sprain

Inversion Sprain

Valmassy3 states that besides the genetic predisposition or familial predisposition other causes to this condition are many and varied such as: Congenital plantarflexed 1st Ray deformity; spasm of peroneus longus; spasm of posterior tibial; weakness of peroneus brevis; weakness of peroneus longus; clubfoot deformity; metatarsus adductus. Underlying causative factors may include but not limited to: Charcot-Marie-Tooth disease, Friedreich’s ataxia, poliomyelitis, spina bifida to name a few.

Plantarflexed 1s

A study of painful Pes Cavus feet ‘indicates that custom foot orthoses are more effective than a control for reducing cavus foot pain and associated limitation in function.

The key feature of a successful orthotic device for this patient population is a contoured flexible shell moulded to the exact morphology of the foot, with a full-length cushioned top cover. Such a device has the effect of reducing and redistributing abnormal plantar pressure loading. For patients presenting to the clinician with painful cavus feet, custom foot orthoses are an effective treatment option 2.

The Pes cavus foot measure orthotics

Commonly Pes cavus feet present with Forefoot Valgus deformity (FFTVL) and it is wise in the assessment to complete a FFTVL assessment.

Biomechanical protractor

Use a forefoot valgus addition on the orthotic to reduce forefoot instability and lateral inversion of the foot by locking the 4th and 5th columns to mimic ground reaction forces.

ICB Orthotics

High arched feet do not usually require a rigid orthotic support, rather a softer accommodative device such as soft or mid density EVA materials.

ICB Orthotic

However, it is important to mould the orthotic well into the arch and use a metatarsal dome to reposition and lift the transverse arch if the toes are clawing.

ICB Orthotic

View ICB Products
REFERENCES
1. Steven Subotnick Sports Medicine of the Lower Extremity Edition 2 p129
2. Joshua Burns, PhD, Jack Crosbie, PhD, Robert Ouvrier, MD, Adrienne Hunt, PhD, Effective Or-thotic Therapy for the Painful Cavus Foot- A Ran-domized Controlled Trial Journal of the American Podiatric Medical Association • Vol 96 • No 3 • May/June 2006
3. VALMASSY, R.L. (1996) Pathomechanics of Lower Extremity Function. Clinical Biomechanics of the Lower Extremity, p. 61, Mosby, St Louis.